Monday, 24 November 2014

Sephora Haul | Part Two | Urban Decay, Anastasia Beverly Hills, Benefit Cosmetics

So I did promise to not bore you all again with the thrilling description of my Sephora New York shopping experience, as seen in part one of my Sephora haul. So I won't.

 Safe to say, it was gloriously glorious.

Today, in part two, I have some purchases from Urban Decay, Anastasia Beverly Hills, and Benefit Cosmetics to share with you.


Some of these products have been swiftly elevated to daily must haves, and one product I am yet to try on my eyeballs...still! Not enough makeup hours in the day!

Let's start with Urban Decay...


Urban Decay Naked Basics 2
Swatched as the shades appear in the palette, in natural light.


I own only one other Urban Decay palette, the rosey toned Naked 3. When the Naked Basics 2 was released a few months ago, I was very keen to make it mine, and managed to convince myself that I needed it even more because I did not own the original Naked Basics.

Touted as the cool toned sister of the original, I have been reaching for this on an almost daily basis. It is beautiful. All of the shadows are soft, creamy, and blend like a dream. It will give you the most beautiful natural eye look, and the darker shades add depth and definition perfectly if you wish to intensify the look. I really love it... really really...


Benefit Gimme Brow Light/Medium,   ABH Brow Wiz Medium Brown,   Benefit fakeup Concealer


One newby from Benefit, and one repurchase! If you have seen any of my 'face of the day' posts on Instagram you may have noticed that Benefit's fakeup concealer is in almost every one. I have reviewed it in full here. In short,  this is my go-to daily undereye concealer.  It gives me medium coverage with added lightweight hydration. A quick swipe under each eye, pat it in with my finger and I'm done. I purchased my first Benefit fakeup in January of this year, and am only now coming to the end of my first tube. Impressed.

Benefit Gimme Brow was on my list of things to purchase on this trip, and it has not disappointed. Absolutely worth the hype in my opinion, it is now the daily second step in my brow routine. The light/medium shade is perfect for my brows. I like how it has very little warmth in it. I love that it adds a little extra fullness, whilst holding my brows in shape all day. Bloody good.

Anastasia Beverly Hills Brow Wiz was another product I was determined to take home. I chose the shade medium brown (previously medium ash) and it is now the first step in my brow routine. The shade is perfectly ashy, the fine tip is so easy to use, and allows me to add definition to my brows without them looking too muddy, or overfilled. The combination of the Brow Wiz  and Gimme Brow is outstanding. The Bees Knees of brows...highly recommend this combination!!


Anastasia Beverly Hills Tamanna Eye Shadow Palette
Swatched as shades appear in the palette, in natural light.


The purchase of the Anastasia Beverly Hills Tamanna eye shadow palette was not at all planned, but it somehow found its way into my little basket. Such pretty shades, and as you can see from the above photograph, they are all very nicely pigmented.
It was definitely calling my name, and I was certainly swayed by the $29.00 US price tag.
I am looking forward to having a good play with this one!


If you would like to check out Part One of my Sephora Haul, you can find it here.


Coming up shortly will be the final Sephora Haul post...yes, there are a few more things to share (gulp) and then a little Duane Reade reveal...cos I just had to do some drugstore haulin'!


Thanks so much for stopping by!


Blessings,


Lou xo

Monday, 17 November 2014

Covergirl TruBLEND Foundation, Concealer and Pressed Powder | Review

Australia saw the new release of Covergirl's truBLEND line of products around two months ago, and being an avid fan of the Covergirl Outlast Stay Fabulous Foundation, I was keen to see what this new line had to offer. The truBLEND range of products are marketed to those desiring a natural, skin-like finish, and boasts blendable textures, designed to meld with the skin. Easy, Breezy, Beautiful. Covergirl. ( Forgive me...I've always wanted to say that ).

Over the course of the last few weeks, I have been testing out the liquid foundation, concealer crayon and powder compact, which were sent to me for consideration, and I feel ready to share my thoughts today.


 L-R Covergirl truBLEND Liquid Foundation Creamy Natural, Fixstick Concealer L 1234,  Pressed Powder No.2


Covergirl truBLEND Liquid Makeup Foundation - Creamy Natural L5

The truBLEND line of products are placed in number groupings to help you choose your best match for your foundation, concealer and powder.

When I was swatching the foundation shades in store, I found there to be a very wide variation in undertones. I am in the shade Buff Beige in the Outlast Stay Fabulous foundation, but the same shade in the truBLEND was way to ashen, and almost grey on the back of my hand. I definitely recommend a good play with the testers prior to choosing your shade. As it turned out, Creamy Natural had warmer undertones, but was a little too dark for me.

This water and silicone based foundation has a lovely lightweight feel, on application I was immediately reminded of  the consistency and feel of the Bourjois Healthy Mix Serum, one of my all time favourite, natural everyday foundations. It feels really lovely on the skin, lightweight and refreshing. Be sure to give it a good shake first, like all water based foundations.

It blends into the skin very nicely, and I have found the best results using my Real Techniques buffing brush, or expert face brush. Creamy Natural is a close to a whole shade too dark for me (and I also found that it darkened again once dry on my skin), however I can work with it, especially when I am  using fake tan on my body.

As I mentioned, it feels nice and light on the skin, offers light to medium coverage, and dries to a very natural satin finish. Unfortunately,  I have noticed that it tends to cling to dry patches. Dry patches on my face tend to be the result of healing blemishes ( sorry for the TMI ) and the pigment in the foundation seems to pool in these areas and take on a ashen/greyish appearance. It then it sets, and doesn't budge. Once dried, I find I cannot blend that pigment away. It is then also very hard to blend concealer over the top. It almost resists any other product.

The wear time on my oily/combination skin is actually very impressive. I have found that to achieve the best finish on the skin is to give makeup primer a miss. The foundation is quite smoothing on its own, thanks to its silicone content.

I find that still get some oil breakthrough around lunchtime, however it is minimal and the foundation itself does not separate or disappear in those areas. I find it very easy to do a quick blot and then a touch of powder and I am looking fresh again.

The only thing that would stop me reaching for this foundation on a regular basis is the fact that it does perform strangely on dry patches. If you have a lot of dry patches on your face, you may find the same thing, or it may be particular to this shade in the line. For me, this foundation will be brought out on days where I have no dry patches of skin at all, a good skin day as they say. Were it not for this unfortunate factor, I would certainly reach for it more frequently. Such a shame.


Covergirl truBLEND Fixstick Concealer Crayon - Shade L-1234

The range of concealers are numbered like the foundations in order to help you choose your best match for your skin tone. The Concealer I have been trialing is from the Fair/Light grouping. It is in the form of a twist up crayon, which I like. Having to sharpen concealer pencils is such waste of product in my opinion. The consistency is very nice, it blends into the skin really well, and offers light to medium coverage. I have tried it under my eyes, and it performed quite nicely over the top of a lightweight eye cream. This shade has a definite pinky/peach undertone which makes it ideal to brighten the under eye area. If you have extremely dark circles it may not offer enough coverage or correction. I did not feel that the concealer emphasised my fine lines, and never looked cakey or dry.

It also works quite well on blemishes and scarring, though I found I needed to build up coverage with a couple of layers on particularly reddened areas. My favourite way to use this particular shade of the concealer was as more of a highlight, applying it under my eye area and high up onto my cheekbone. It blends nicely with either fingers, a flat concealer brush, or just my foundation brush. If you like a highlight without any shimmer or glow, this is worth a try. Both the packaging and performance make this concealer ideal for touch ups. In the handbag she goes. 


Covergirl truBLEND Pressed Powder No.2 Translucent Light

I was quite impressed with the powder. It feels quite smooth and soft to touch. I have used it to set my makeup with a big fluffy powder brush, and have also used it for touch ups throughout the day, with the included little sponge. The sleek, mirrored compact makes it ideal to pop in your makeup bag for touch ups, and when used with a dry sponge I actually find it to add a tiny bit more coverage, even though the packaging states translucent. It is quite smoothing and complementary on my large pores and fine lines, and gave a nice diffused, and polished look to my skin. It does have a finish that is more on the matte side, if you overdo it you may end up looking a little flat and dull. It too currently occupies my handbag.


Have you tried any of the products from the Covergirl TruBlend line? I would love to hear your thoughts if you have? Did you have a similar experience as me with the foundation?


Thanks so much for stopping by!


Blessings,


Lou xx


Disclaimer: These products were kindly provided for my consideration. I am always honest, and present solely my own views and thoughts after appropriate time for testing. Cheers. xx

Thursday, 13 November 2014

The Beauty Vine goes to Camp Beauty Graduate Class!

On the weekend prior to heading off to New York, I was lucky enough to be invited to attend the Camp Beauty Graduate Class with Camp Beauty Australia.

Camp Beauty Australia is run by two completely fabulous women, Michelle Scott and Jo Cotter.
With decades of experience between them, working on many famous faces in both television and film, these two professional makeup artists have created a unique business, designed to bring the everyday woman the tools, skills and techniques, and products to empower them to feel confident in makeup application.


Camp Beauty Australia - Jo Cotter and Michelle Scott


As a young teenager, I could not wait to get my hands on some makeup! When I finally was allowed to ( thanks Mum ), I would spend much of my time playing, experimenting, practising and learning. 20 odd years on  ( *cough* ), I am still doing exactly the same thing...playing with different tones and shades, experimenting with new products, tools and application techniques, practising, and always always always learning.

I am often suprised when many of my friends tell me that they have little confidence in makeup application...they are often not sure which colours or shades will suit them, what tools to use to apply makeup, and actually how to do it. I sometimes wrongly assume that everyone is as obsessed with makeup as I am!  No Lou...they are not!

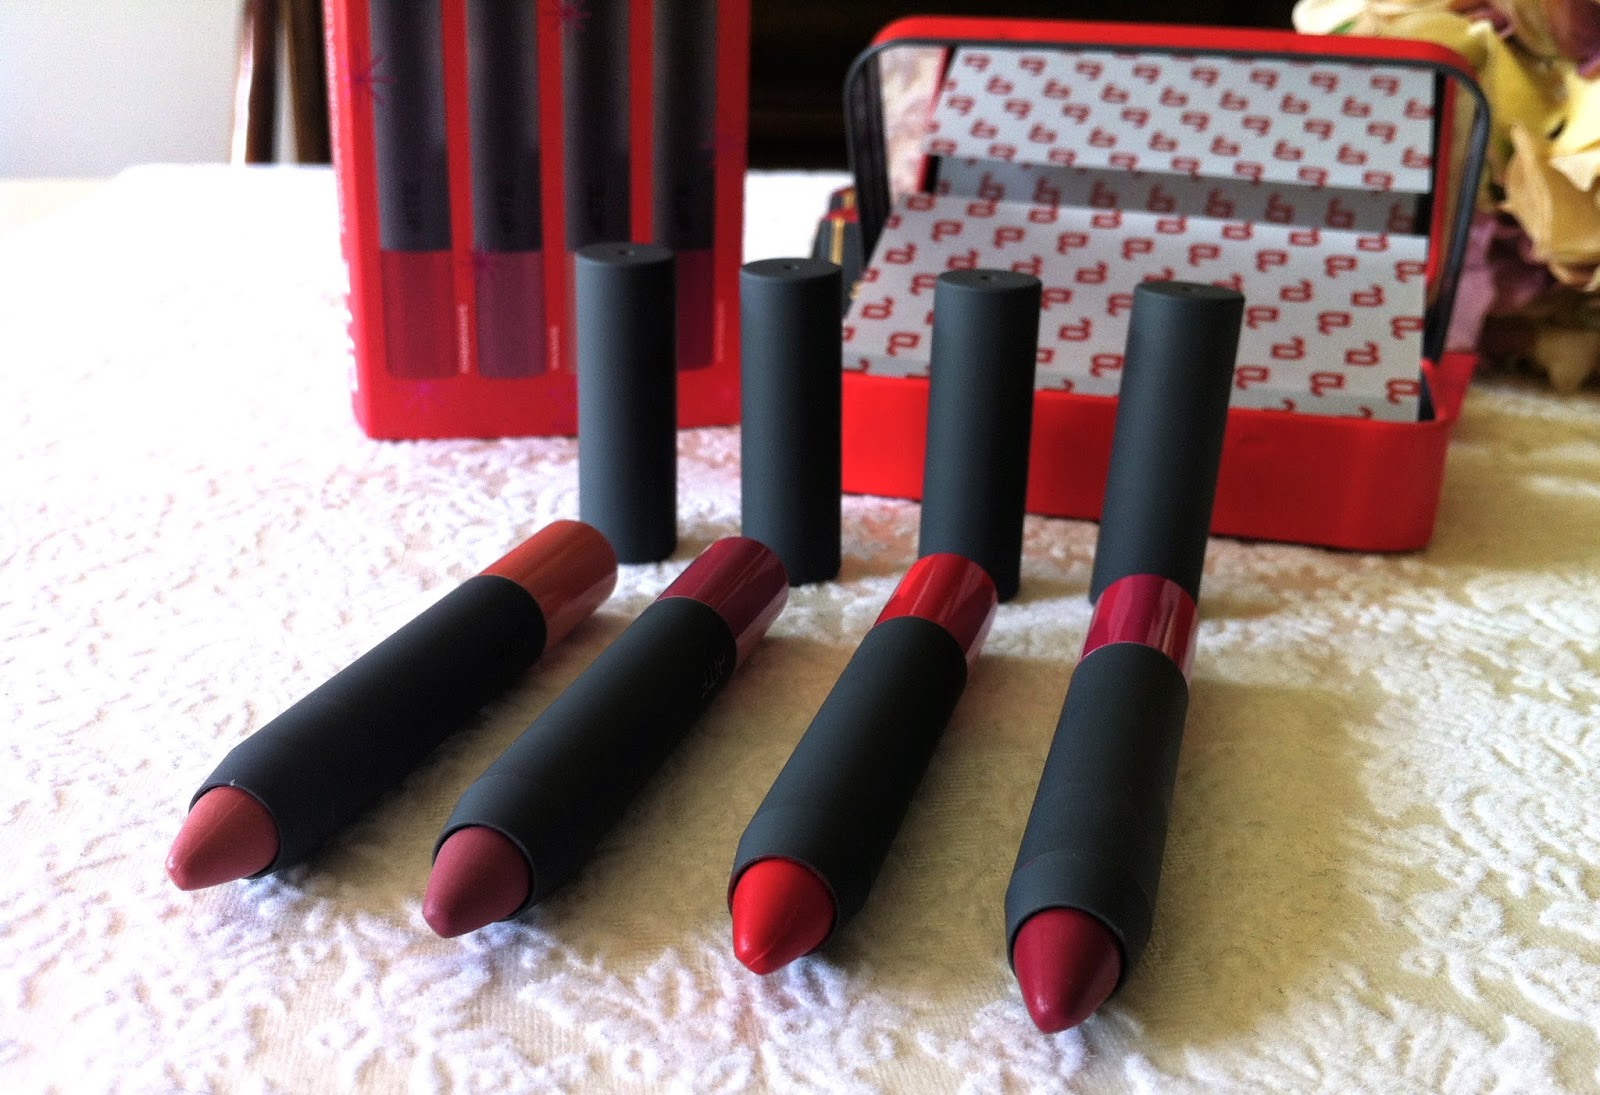
Not only do Michelle and Jo teach you application techniques, and provide individual colour matching, they also have their very own complete line of cosmetics. To add to that, they have also designed a beautiful set of 15 makeup brushes, all of which you get to play with and use during your class. Michelle and Jo talk you through step by step makeup application, from the basic 5 minute face, perfect for the daytime, to the more advanced 15 minute face, featuring either a smokey eye, or a classic contoured eye tutorial.

All of Michelle and Jo's products are available to purchase on the day, which I think it brilliant. They have a wonderful range of products...absolutely everything that you need and more! I think a lot of people, myself included, can often feel a little apprehensive approaching counters in department stores, it really can be a daunting experience!
Well, not at Camp Beauty. I felt relaxed and comfortable the whole time, even though I was having a bad skin day ( ...great timing yes ). The class is all about touching, trying, using, experimenting with different colours, and Michelle and Jo are relaxed, accommodating and helpful. It really adds to the uniqueness of the experience I feel, finding the shades and colours that suit you, learning how to apply them, and then having to opportunity to purchase those same products and take them home with you. 

With classes held in the Sydney suburbs of Balmain and Hornsby, the room is set up beautifully, with a large table in the middle, and room for five makeup stations along each side. In front of each person is a makeup vanity case full of everything that you will need for your class, including a full set of Camp Beauty Brushes for you to use and test first hand. Lets just say I was in my happy place!

Michelle and Jo have used Neutral, Hot, and Cool colour groupings to assist women in finding the most complementary colour cosmetics. At the beginning of the session they attend to everyone individually to assess whether you are Hot or Cool, and colour match your foundation and concealer. Their colour cosmetics are all labelled with Neutral - N, Cool -C , Hot - H to assist you in your choices. 

These are by no means fixed rules, but serve as a very useful guideline not only for makeup but for clothing and accessories as well. It certainly gives your overall look a certain synergy when your makeup, outfit and accessories tie in together. I tend to lean towards the cooler end of the spectrum, and most of my wardrobe at home reflects this. However, I really love the look on my eyes of a warm bronze eyeshadow... remember they are guidelines, not rules. I do have some pink undertones and red areas on my face, however once I correct that, I find that I can often pull off either warm or cool. Do what makes you feel happy and confident!


In the photograph above are the booklets that we were given at the beginning of the class. They have a detailed list of  instructions for each look that you learn, allow room for making notes, and contain face charts for you to play with as well.
There is room to record your particular shade names and numbers for the products that you use during your class. This allows you to have both a record for the future, and a reference should you choose to purchase any of the products on the day.

Now whilst I have applied my own makeup many, many times, I personally really like to make the most of professional makeup artist when I get the chance ( ie. suck the life out of them). There is always something new to learn, even if you might feel quite confident already!

One thing I have always struggled with is the application of my crease shade.  I learnt a brilliant trick on the day, which was to tilt my head back slightly when applying shadow, and to apply it slightly above the natural crease of the eye. "Well derr" you might all be saying...but this simple trick now means I can see exactly where to place my crease colour, and the shadow is now perfectly visible just above my crease, instead of barely being noticeable. Hooray for Lou!


Inspriation boards, brushes and beautiful eye shadows


Just a few of the beautiful Survival Kit eye shadow shades available, all named in the military theme


My fifteen minute face

DO excuse my "Deer caught in the headlights" expression! This is me at the end of the session, with my fifteen minute face. Can I just say it is hard to take a reasonable selfie in a room full of people!


 Survival Kit Eye Shadows  L-R  Bunker Beige, Ambush Annie, Military Mauve, Purple Heart

Although I didn't purchase any eye shadows, I can without hesitation, warmly recommend them. They have a beautiful, smooth, silky texture, excellent pigmentation and colour payoff, and blend beautifully on the eyes. The swatches above are one swipe of colour...gorgeous! In my opinion, the quality is absolutely comparable to Too Faced, Urban Decay and MAC eyeshadows. The eye shadows are sold individually, and Michelle and Jo have a couple of different size eye palettes to choose from, depending how many shadows you would like. I'll have one of each thanks....


Base Camp Basics Kit - Powder foundation


I did purchase the Base Camp Basics Kit on the day, which consists of a primer, concealer, foundation and Buki brush, along with the gorgeous Survival Kit makeup bag. I chose the mineral foundation, which is what we used on the day. I am a big fan of mineral foundation, and find it perfect for the warmer months as my preferred base. This one performs very well, it is easy to blend, and gives very good coverage without looking heavy or powdery. It is conveniently pressed, in a nice sturdy compact with a mirror. Thumbs up.

The Buki brush is small, densely packed and gloriously soft. If anything I wish it was just ever so slightly bigger. I only have small hands, and find it a little difficult to get maintain a good grip on the handle whilst buffing in the foundation. Apart from that, it is brilliant.

The Make-Up Primer is lovely, and a pleasure to use. It contains only six ingredients, it is all natural and feels light and refreshing on the skin, smoothing my pores and fine lines and providing a nice base for the mineral foundation. For me, it feels nourishing enough to skip my moisturiser, something those with oily/combo skins may appreciate. A subtle hint of lavender extract makes it sensory treat as well. Love.

The concealer is in a stick form, offers good medium, buildable coverage. It is not too dry, like some stick concealers can tend to be. It does not tug on the skin, but does not slip and slide all over the place either. It works equally well under the eyes and on blemishes/scarring, and doesn't disappear halfway through the day. Nice.


My Survival Kit Brushes in New York!

I took the Survival Kit make up bag with me to New york, along with the Survival Kit Brush set, which Michelle and Jo gifted to me on the day of my Graduate Class, for which I am so grateful!

I am really enjoying them! They are beautiful quality, and feel soft and luxurious. Michelle and Jo have numbered them in the order that you might use them as you are applying your makeup, which is perfect for those just starting out with makeup application.

I have been experimenting a little with mine, as I like to do, and finding quite a few good multi-task brushes in the mix. The number 14 Shader brush, suggested to use for contouring and bronzer, also works well for me for blush, and I have also used it with liquid foundation, which it buffs into the skin beautifully. I can honestly say, that I am reaching for the eye brushes on a daily basis (love) and the concealer brush works very nicely to apply cream eyeshadow to the lids. 

When you head over the the Camp Beauty website here, you may find this brush set on special for Christmas, with a brilliant saving ( almost one third off the normal price! ), along with their complete line of cosmetics to peruse.


I highly recommend the Camp Beauty Graduate Class. It would be a perfect Mother/Daughter day, a lovely way to spend a morning with a good friend, or sister, and even if you feel confident in your own makeup application, you will have a chance to spend two and a half hours playing with a beautiful line of cosmetics and brushes, in the company of two very lovely and experienced makeup artists.


Does this sound like something you might like to do?


Today, I am delighted to be able to share with you a very special, and very generous giveaway from Michelle and Jo, especially for The Beauty Vine readers! Yay for you guys!


Would you like the chance to win a place in a 2 1/2 hour Camp Beauty Graduate Class for you and a friend or family member at the Balmain or Hornsby Campus'?


TO ENTER, please leave me a comment on this blog post, telling me;


1.  Why you would like to go to a Camp Beauty Graduate Class;

2.  Who you would like to take along with you and why!

3.  Please include your first name, and an email address for me to be able to contact you

4. If you would prefer not to leave your email address, please leave me your Instagram Account Name, so that I will be able to contact you that way via direct message.

4. PLEASE NOTE that you must be able to transport yourself to either the Balmain or Hornsby Class in Sydney, NSW Australia, for a 2 1/2 hour class.


Please note that the minimum age for attendance to Camp Beauty is 13 years.


Please obtain permission from your parents to give your details if you are under the age of 18 years.


Entries will close one week from today on Thursday 20th November at midnight.


I will contact the winner via email, or direct message on Instagram, and also make a notation on THIS blog post on Saturday 22nd November, announcing the winner!

The date of the Camp Beauty Graduate Class will be negotiated with Michelle and Jo once the winner is chosen!


GOOD LUCK LOVELIES!


Blessings,


Lou xo


UPDATE 23rd November : Giveaway now CLOSED.The winner of my giveaway is Jane! Thanks Jane for entering, I hope you have a fabulous time!!


Friday, 7 November 2014

Sephora Haul | Part One | Bite Beauty & Too Faced

I will admit to feeling a sudden increase in heart rate, and became aware of small beads of perspiration forming on my upper lip as I caught site of the unmistakable black and white framed mothership of beauty that is Sephora. 

My spirits soared as the escalator swiftly delivered me to the top floor of the building at No.10 Columbus Circle. With trembling limbs, I managed to deftly navigate my way through a stream of busy New Yorker's... I was focused...I was driven...I was going shopping.

I was going to Sephora.

I was greeted by smiling, friendly staff, who were consistently helpful and attentive. I think I may have met them all twice. Though I would have loved to have been colour matched, and spend some time with the MUA's, what I really wanted to do was just explore. Pick up, feel, look, touch and swatch many of the products that I had only ever previously seen through my computer screen.

I did try to be careful, and quite a few things that were placed into my little silver basket were hence removed and put back on the shelf. My aim was to try and get a little of everything, makeup, body care and skincare, though to my surprise I actually managed to leave without purchasing one nail polish. There might have been a certain Marc Jacobs shade in my basket for a spell, but he was returned in favour of what I am about to share with you today...well, one of them anyway!

I thought I would spread my show and tell over a couple of posts, otherwise things might get a little picture heavy, and I may run out of places on my body to swatch!

Today's part one features the brands Bite Beauty, and Too Faced lip products. Luscious lip pencils and lacquers to make the beauty lover swoon...both brands were on my list to explore.

  Come and see what I chose...


Too Faced Melted Liquified Long Wear Lipstick   Top - Melted Candy   Bottom - Melted Berry
RRP $21.00 US


A fairly recent release in Australia, the Too Faced Melted Liquified Lipsticks have received many positive reviews online. I was actually looking for the holiday set which featured four of the shades, but was unable to find it. These two shades were the ones that appealed to me initially, so in the basket they went. Melted Fig was a front runner but alas was sold out. They are both ridiculously pigmented, Melted Candy was almost too intense to capture in a photograph. On swatching the formula reminds me of the Rimmel London Apocalypse Lip Laquers. I will keep you posted on my thoughts.


Bite Beauty-  Best Bite Remix Holiday Set   RRP $25.00 US

This little set of mini's represents great value in my opinion, and I could not walk past it. I have always wanted to try Bite Beauty products, and this set gives me four shades to play with, and an opportunity to gather my thoughts on the all natural, food grade ingredients that the brand is famous for. I have to say I am excited to try all four of them. I think the set has a brilliant range of shades, from nude to neutral, cool toned red to deep berry... there is definitely something for everyone. I think I may struggle to choose a favourite...


Bite Beauty High Pigment Lip Pencils L-R  Sable, Rhubarb, Pomegranate, Winterberry


LEFT - Bite Beauty, Sable, Rhubarb,  Pomegranate, Winterberry       RIGHT - Too Faced Melted Candy, Melted Berry
Photographed in direct natural light


Shades as above photographed in indirect natural light


Bite Beauty High Pigment Lip Pencil
L-R  Sable, Rhubarb, Pomegranate, Winterberry
I have included this third photograph of swatches above, because I believe that it represents the truest colour/shade representation.


I am so excited to get these on my lips! Have you tried any Bite Beauty Lip products? I did toy with the idea of trying to visit the Bite Beauty Lab whilst in New York, but I just ran out of time! Do you have any favourite Too Faced Melted Lipstick shades? I would love to hear from you!


Do stay tuned for the next instalment of Lou's Sephora Shenanigans...I promise I'll spare you the overly dramatic introduction next time. 


Thanks so much for stopping by!


Blessings,


Lou xo

Wednesday, 5 November 2014

The Weekend Mix...with Indeed Laboratories

With the festive season approaching at the speed of light, as it always seems to do at this time of the year, getting your skin party ready in preparation for the many Christmas, and end of year events ahead is a good idea.

We all know how much your makeup application and wear is affected by the condition of your skin. I can really notice the difference in how my makeup looks when I have taken the time to prepare my skin beforehand. Today I have some Indeed Laboratories products to share with you to get your complexion looking plump, hydrated, glowing and party ready!

These four products were sent to me for review and consideration recently, and I thought I would share my thoughts with you today on how I find best to use them. Described as the "Weekend Mix", these four products certainly work very nicely on their own,  however put them all together and you'll discover a really nice pre-party pamper combination.

Ready to glow? Read on!


indeed Laboratories Moisture Boosting Mask

Cloth facial masks have really surged onto the skincare market over the last 12 months. I love them. Their packaging lends well to travel, and the single use feature is clean, convenient and ensures the freshness of ingredients. Their ease of use also gets a thumbs up from me, not to mention giving your family a good fright when you emerge from the bathroom looking like something out of a horror movie!

When indeed Labs Hydraluron Serum was first released in Australia, I was there lining up with fellow skincare junkies to get my hands on it. This is mostly due to Caroline Hirons singing its praises...those who follow her will know that for a time it was affectionately renamed "Hironsluron"....I digress...

Whilst I did have good results with the serum, after some weeks of use I noticed that it was feeling a little tacky on my skin, and took a while to absorb. Anyone else find this?

In any case, the Hydraluron Moisture Boosting Mask does not have this effect, and I think it is a beautiful sheet mask, that gives great results...quickly. The serum that soaks the cloth seems to be a lighter, more fluid consistency, full of hyaluronic acid which draws moisture to the skin and holds it there like a magnet. Another moisture holding ingredient, glycerin, aids in hydrating the skin, whilst the addition of vitamin E heals and protects.

After cleansing, I will open the sheet mask carefully, place my hands at the bottom of the packet, and gently try to squeeze out the excess serum that the cloth is floating around in. There is 20ml of serum in each of these masks, you might as well get the benefit of all of it I say! I smooth that extra serum over my skin first, and then open out the mask and apply to my face.
Alternatively, you can squeeze out the remaining serum from the package after removing your cloth mask, and smooth it over your face and down your neck then. Completely up to you.

Now the instructions say relax for 10-15 minutes, so I will typically fold washing, attend to childrens needs, start cooking dinner etc. however I do recommend you try to have a rest. Relax on your bed. Stop checking Instagram and Twitter, close your eyes and take some deep breaths. Try to fit in a little "me time" if you can.

After 10-15 minutes, remove the mask, dispose of the cloth, and massage in the remaining serum that is left on your skin. I will make sure to pat some around my eye area as well. My skin looks hydrated, and feels plump and comfortable.

On to step 2....


indeed Laboratories eyesilix Instant Eye Rescue

I have mentioned in previous posts that tend not to get along with a lot of eye creams. I will often use whatever serum I have in rotation around my eye area in place of a designated eye cream. They are often notoriously expensive, and with the exception of a few, leave me with puffy, swollen eyes because they are just too heavy and rich.

Eyesilix is a no fuss, fragrance free, lightweight eye cream that I have been enjoying, both morning and night. It works really nicely under makeup, and provides a nice smooth, hydrated base for my concealer. It does have a very subtle light-reflective quality, and is also very smoothing on the fine lines around my eyes. I haven't noticed a great deal of difference in terms of a reduction in darkness under my eyes, so perhaps this is something that comes with long term use.

A little goes a long way, I take a small amount of product, pat it between my fingertips, and then pat it gently around the contours of my eyes.

Step three coming up... ( hope you are still with me! )

indeed Laboratories Pepta-Bright Intense Brightening Treatment

Dullness?...Yes!   Dark Spots?...Yes again!

Indeed Labs describe pepta-bright as a cream/serum hybrid. For my oily/combination skin I find it does the job of both serum and moisturiser. It feels very nourishing, though still lightweight enough to absorb nicely into the skin. Like eyesilix, it adds a very subtle glow to the skin.

I do believe that regular use of Pepta-Bright is helping to improve the appearance of some areas of hyperpigmentation on my face. It does contain lactic acid, which is one of the more gentle acids that aid in chemically exfoliating the skin. I feel it is important to note here that I use other products in my skincare routine that are also working well to assist in reducing the appearance of my pigmentation. 

For an event or party, I will normally reach for a long wearing, medium to full coverage foundation. I have found that Pepta-Bright provides a really nice base for makeup on its own, without the use of an additional primer. This of course is up to your own personal preference.


indeed Laboratories Nanoblur

Nanoblur is not designed to be a makeup primer. It is your finishing step...your magic wand...your instagram filter in a tube.

This silicone based gel is designed to smooth over and diffuse the look of fine lines, enlarged pores and wrinkles. It is recommended to use after your foundation, and before your powder. 

I like to use it as one of the final steps in my makeup, just prior to applying a setting powder. 

I take a small amount on my fingertips, smooth them together to spread a thin layer of product, and then tap the product gently over the areas I feel I need it. If I need more, I will dispense another small amount onto clean fingers again, and repeat.

It does take a little practice in order not to disturb your foundation, but if you use small amounts, and a light hand it will work beautifully. The product tends to get tacky and set quickly, so I try to wait after the first layer for a minute. Being patient and waiting will likely give Nanoblur time to do its blurring magic. If you keep on layering too quickly, you are more likely to disturb the foundation underneath.

The areas I focus on are around my eye contour, where I have fine lines, and also around my nose and down the side of my mouth, where I have larger pores and fine lines, and my forehead ( yes ok basically everywhere! )

This may all seem a little fussy, but once you get the hang of it the results are really lovely, and definitely worth it for me for a special occasion or event.

All that's left to do is to decide which shade of lipstick to wear! 


So there you have it loves! I would love to know if you have tried any of these indeed Laboratories products? I know they have recently released a new Moisture Jelly, and powdered Exfoliant, and I have heard great things about both...have you tried them? Do I need them on my list? Do you have a favourite skin pampering routine before a special event? I'd love to hear from you!


Thanks so much for stopping by!


Blessings,


Lou xo


Disclaimer: As mentioned in the body of this post, I was gifted the above mentioned products. My thoughts are always my own, and are offered after appropriate time to test and form my own opinions. Cheers xo


Friday, 31 October 2014

MAC New York Haul

A visit to the MAC store was high on my list on my recent trip to New York. As we only had a short time in the city, and believe me there is so much to see and do, I knew I had to be decisive and focused! Although I would have loved to be colour matched for base products, and filled my basket with a million goodies, I just didn't have time, so it was lipsticks and eyeshadows that came home with me. The MUA that helped me was lovely...seriously could have played in there for hours...

So a little show and tell today, 4 new lippies and an eyeshadow quad that I put together. I love everything, and am very happy with my purchases...come and have a look!


The Loot...


L-R   TWIG,  BRICK-O-LA,  CRAVING,  LUSTERING

I was really keen to try a couple of different finishes in the lipsticks. Both Brick-O-La and Craving are Amplified, and are both stunning! Gorgeous saturated colour, Craving leans a little more plum, and Brick-O-La a warmer, muted, very wearable red. Twig is a Satin, and has a comfortable, satin/matte finish on the lips. I have worn this quite a few times...it is an absolutely gorgeous, deep neutral and it fits the nineties lip trend very nicely!! Lustering was calling to me...such a beautiful shade, and it is a Lustre finish. These types of shades can be a little intimidating in an opaque formula, but this is sheer, moisturising and just really pretty for spring/summer!


L-R  TWIG,  BRICK-O-LA,  CRAVING,  LUSTERING


As I mentioned, the MUA that helped me was lovely ( so sorry I can't remember her name ), and helped me put together these four gorgeous shadows. My aim was to have lovely warm shades, and I am so happy with my choices. On a side note, these are my first MAC eyeshadows...

Both Woodwinked and Mythology are perfect lid shades that I will happily blend up into the crease. I have wanted Woodwinked for the longest time, and Mythology has the most beautiful rose gold tone. Love them both! Rice Paper is a beautiful highlight shade for me...it is a soft, pale gold that gives a gorgeous, subtle glow to the inner corner and brow bone. Brown Script was my choice for a deeper toned matte shade. I love its warm, reddish undertones...I have been loving this on my top lash line instead of liner. 


L-R   RICE PAPER,  WOODWINKED,  MYTHOLOGY,  BROWN SCRIPT

Slightly out of focus...but gosh it shows the gorgeous glow of Woodwinked and Mythology!


I am very happy with my new lovelies! Do you have any of these shades? I would love to know your favourite MAC eyeshadows and lipsticks, please feel free to leave a comment below!


Thanks so much for stopping by!


Blessings,


Lou xo

Monday, 13 October 2014

Quick Update...The Beauty Vine and The City

Hi lovelies!

Just a quick little update/chat post to let you know that in a few short hours I will be leaving Aussie shores and landing here...


...TOMORROW!!

It is only a short trip ( 5 days to explore the city ) but I am so excited!!

I have a plethora of beauty posts coming your way on my return, so please don't think I have forgotten about you! It will be only my husband and I going, so preparing my household for my family to care for our 4 children whilst we are away for a week has not allowed me much time to pre-prepare posts for the blog. My apologies!

I will no doubt be sharing bits and pieces of the trip on my Instagram page, and be doing a wee bit of beauty shopping, so look out for my posts on there if you are interested to see what I get up to!!

Thanking you in advance for your patience and understanding! I'm off to paint my nails, have a cup of tea, and go to bed in some vain attempt to sleep!!

Have you been to New York City? I would love to hear about your favourite New York things... and what you enjoyed most...and where you love to shop of course!!

And rest assured...if I happen to bump into Carrie and the girls, I'll be sure to tell them you said hi...


Blessings,


Lou xo


Photo Credit: @tuulavintage from Instagram with the caption " Sunset light over Central Park "

Related Posts Plugin for WordPress, Blogger...